How to take care of your feet on a long walk
Share
A multi-day trek is not just about your shoes or your backpack: your feet are the true protagonists of the adventure. If you don't take good care of them, you risk blisters, pain, and discomfort that can ruin everything. In this article, I explain how to give your feet the attention they deserve during a trek, with practical tips you can put into practice right away.
1. Preparation before you set off
1.1 Trim your nails and file them well
Before putting on your shoes, check your nails: they should be short and free of sharp edges. Nails that are too long or have uneven edges catch on your socks, press against the toe of the shoe, and can cause blisters or even hematomas under the nail.
1.2 Gradual training
If you aren't used to long walks, incorporate a few 1–2 hour outings on a regular basis in the weeks beforehand. This helps the skin and muscles of your feet get used to the load and pressure, reducing the risk of discomfort during the first few days of trekking.
1.3 Choose the right socks
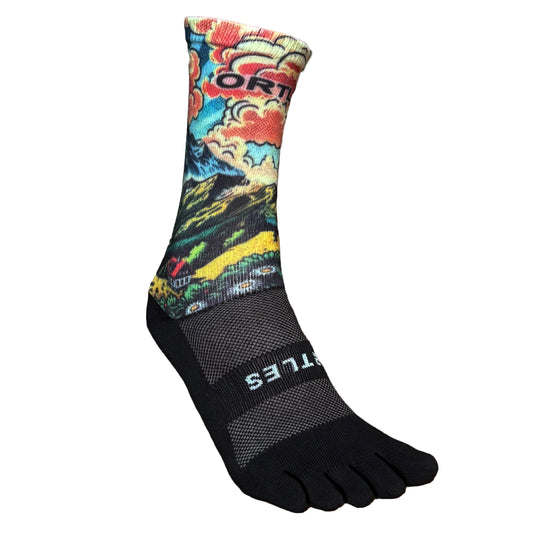
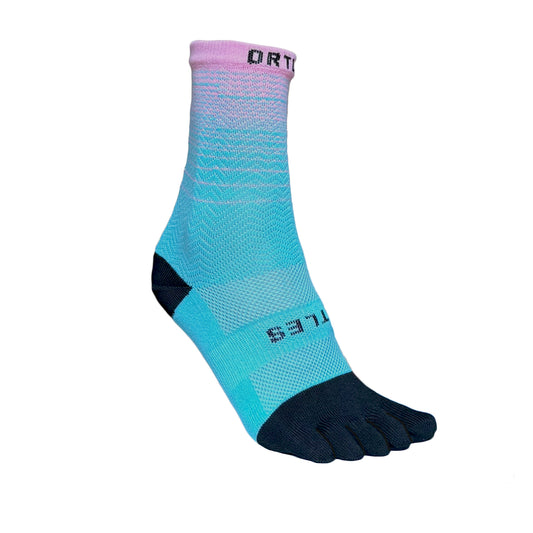
I always recommend Ortles Run toe socks: they wrap around each toe, reduce internal friction, and promote breathability. Bring at least two pairs and rotate them every day (this allows the fibers to rest and makes the socks last longer). Rotating them also prevents the formation of odors and bacteria, because each pair will have time to dry completely.
2. Materials and protection
2.1 Protective or anti-friction cream
Before starting, apply a thin layer of specific cream between your toes or on high-risk areas (heel, inner part under the big toe). There are anti-friction creams or special sticks for trekking: they create a barrier that allows for slight sliding, reducing the formation of blisters.
Regular Vaseline works very well.
2.2 Protect sensitive areas
If you already have spots where you know you tend to get blisters (under the second or third toe, behind the heel), apply a preventative bandage or use "dotters" (pieces of pre-formed adhesive material) to create an extra layer of protection. This way, even if heat and friction increase, your skin stays safer.
3. During the trek: daily care
3.1 Check your feet at every break
Stop for a few minutes every morning and check your feet: take off your socks and shoes, dry your feet with a thin towel, and examine the skin. If you see redness or small friction points, stop, dry them well, and apply a layer of anti-friction cream. If you are already starting to feel discomfort, apply a bandage to protect the area.
3.2 Change your socks if they get wet
Our Ortles Run socks are characterized by their ability to dry very quickly. If you cross a small stream or get caught in a light downpour, the socks will dry right away (always wear breathable shoes!).
However, if it is a rainy day and there isn't enough time for the shoes to dry, stop at least once to change your socks. Walking in damp socks increases the risk of blisters. Gently wring out the wet socks, put on dry ones, and, if you can, let the wet socks dry in the sun – otherwise, hang them on your backpack to let them get some air.
3.3 Dry and clean your feet
At mountain huts or intermediate stops, take off your socks and shoes as soon as you arrive and wash your feet (even if just with a wet wipe). Dry them carefully, especially between the toes. If you feel discomfort, apply a light moisturizer, but avoid very greasy products that make the sock slippery. Alternatively, a bit of talcum powder helps feet stay dry and protected.
4. Preventing blisters and pain
4.1 Choose the right shoe
This point may seem trivial, but a shoe that is three sizes too big or too small can make a difference. The sole must be stable, and the upper should be snug but not too tight. If you feel pressure points, don't wait: loosen or adjust the laces, or perhaps insert a softer insole.
4.2 Adjust the laces well
Learn the "locking knot" technique on the instep: this prevents the shoe from slipping (if it's too loose) or tightening only at the top, which creates a pressure point. If you feel your foot sliding forward, you can use the trick of crossing the laces diagonally before threading them through the last eyelet: it holds the heel more firmly.
4.3 Take short relief breaks
Every 1–2 hours of walking, find a place to prop up your foot, shake it out, or perhaps take a few steps sideways or on a rock to let your muscles and joints rest. Even a few seconds are enough to provide relief and reduce heat buildup in the sole of the foot.
5. Quick repairs and emergency remedies
5.1 First aid kit for feet
Always keep the following in your first aid bag:
- Specific blister bandages (like Mepilex or Compeed).
- A small stick of anti-friction cream.
- A tube of gentle disinfectant and sterile gauze.
5.2 If a new blister appears
Do not pop it immediately: if it is tiny and does not hurt, try to protect it with a specific bandage without breaking it, so the skin underneath stays cleaner. If it is large, infected, or very painful, dry the area well with sterile gauze and, after disinfecting, make a small puncture with a sterile needle at the edge to drain the liquid (leave the skin on top intact), then cover it with a padded bandage.
5.3 Repairing a small skin tear
If the skin is already damaged, clean the area well, apply an antibacterial cream, and cover it with a patch or gauze and tape. Let it breathe as much as possible, but avoid walking barefoot to prevent getting the wound dirty.
6. After the stage: evening foot care
6.1 Massage and stretching
Lie down and boost circulation by elevating your feet for a few minutes. Then, using a cream or oil, massage the sole of the foot with circular motions: start from the heel, pass under the arch, and move toward the toes. Stretch your calf and foot muscles, for example by rolling a plastic bottle under the sole: just a couple of minutes are enough to relieve tension.
6.2 Checking nails and skin
Take a quick look every evening: trim nails if necessary, and evaluate whether there are new calluses or hard skin. If you notice dark spots under a nail, dry the area and keep an eye on it in the following days: it could be a hematoma caused by minor micro-injuries.
7. Behaviors to avoid
- Walking barefoot in mountain huts: even if the idea of letting your feet "breathe" sounds good, walking barefoot on common floors increases the risk of mycosis or fungal infections. A pair of lightweight slippers is better.
- Ignoring the first signs of discomfort: tingling or slight redness, if not managed immediately, will turn into an open blister within a few hours. When you feel an area tingling or "pulling," stop and intervene before resuming your walk.
- Cutting corners on shoes: investing in a good, quality trekking shoe pays off in durability and comfort. Cheap shoes may have poorly cushioned soles or low-quality materials, increasing stress on your feet.
Conclusion
Your feet are the foundation of every step and deserve constant care and attention during a trek. Remember to:
- Prepare before leaving: trim your nails, do gradual training, and choose suitable socks and shoes.
- Protect sensitive areas with bandages and anti-friction creams.
- Check your feet every day: change socks, dry, and clean.
- Manage blisters with a first aid kit and proper techniques.
- Pamper your feet in the evening with massages.
By following these simple steps, you will be able to walk for kilometers without a care, with the confidence of feet that are always in good shape. Enjoy your walk!